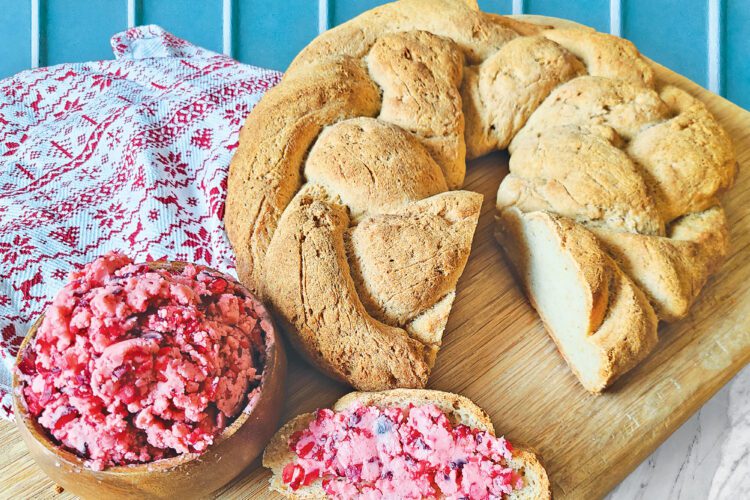
If you are new to the gluten free world, you have quickly discovered there is a BIG difference in the taste, texture, density, and size of gluten free bread. You might also have discovered that gluten free bread often lacks in nutrient density as well. This Braided Gluten Free Bread was created by me in an effort to feed my family a more nutrient dense more “whole grain” type of a gluten free bread.
In true gluten free fashion, this loaf does not have a lot of height, as it is baked right on a pizza stone and not in a pan or form. Without gluten, gluten free bread is just not stable enough to rise and hold the air pockets in it like regular bread. Because of this, most gluten free breads will be more dense, and despite the higher water content, will be somewhat dry. However, this braided gluten free bread is nicely crunchy on the outside, yet still soft on the inside.
Like every gluten free bread you bake, you must COOL IT COMPLETELY. No cheating on this. Trust me. Because of the nature of gluten free flours, they absorb moisture differently- more slowly. Because of this, it is necessary to let it cool completely before cutting into the loaf so you don’t have a gummy or “wet” texture inside. It is also important to use a digital thermometer and make sure your braided bread is at least 205 degreed on the outside of the bread, and in the center of the bread.
The combination of flours that I use, as I mentioned already, were chosen to get a higher protein, fiber, and vitamin content. Sorghum flour is a great flour and is the base of this bread. Because sorghum flour is high in insoluble fiber(4gm total dietary fiber in 3TBSP serving), it is broken down slower in your digestive system. This helps to keep you blood sugar at moderate level after eating. This grain is used a lot in Africa and India cooking.
Tapioca flour/starch is a necessary part of creating a gluten free flour blend. You need to have a the right balance of starch and grains/seed flour to create a good gluten free blend. Tapioca flour is extracted from the cassava root. It helps in binding the bread together and in creating a lighter texture for your baked goods. I also use Cassava flour in this bread blend. Cassava flour is obtained from drying and processing the flesh of the cassava root. Although it is not high in protein, the starch in it is said to help in slowing digestion. Cassava flour also helps add flavor and helps us achieve a good texture for this bread.
Next I used buckwheat flour. Buckwheat contains two great flavonoids, Rutin and Quercetin. Rutin works to help strengthen your blood vessels, and Quercetin can aid in decreasing inflammation. It is high in protein, fiber, and vitamins such as Manganese, Copper, Magnesium, and Phosphorus.
Almond flour is another flour in this bread. I love almond flour. In just 1/4 C of this flour, you are getting 6 gm of protein, 3 gm of dietary fiber, and 6% of your daily iron intake. I like to add this to a lot of my baked goods. Be careful in the quantity you add almond flour. It can add a “grainy” texture if used in too high of an amount.
Potato flour, NOT starch, is also included in this blend. Potato flour is made from ground, dry potatoes and is very high in vitamins, iron, and protein as well. Can you see a pattern here in the flours I chose?
Tiger nut flour, is not a well known flour, but in my opinion, it is absolutely necessary for adding additional flavor depth to your gluten free baking. Tiger nut flour has a very high iron content and fiber content, so I love incorporating this flour into my baking.
Besides choosing the right flour combination, it is important to have the right amount of psyllium husk powder to aid in the binding of these gluten free flours. This also allows us to form the bread dough into ropes so that we can braid them without the bread dough “breaking” or falling apart.
I know that it can be challenging and expensive to purchase all these different flours. But, when it comes down to your health, I think you are worth choosing flours that will help keep your colon happy.:). Now, let’s get onto this recipe!
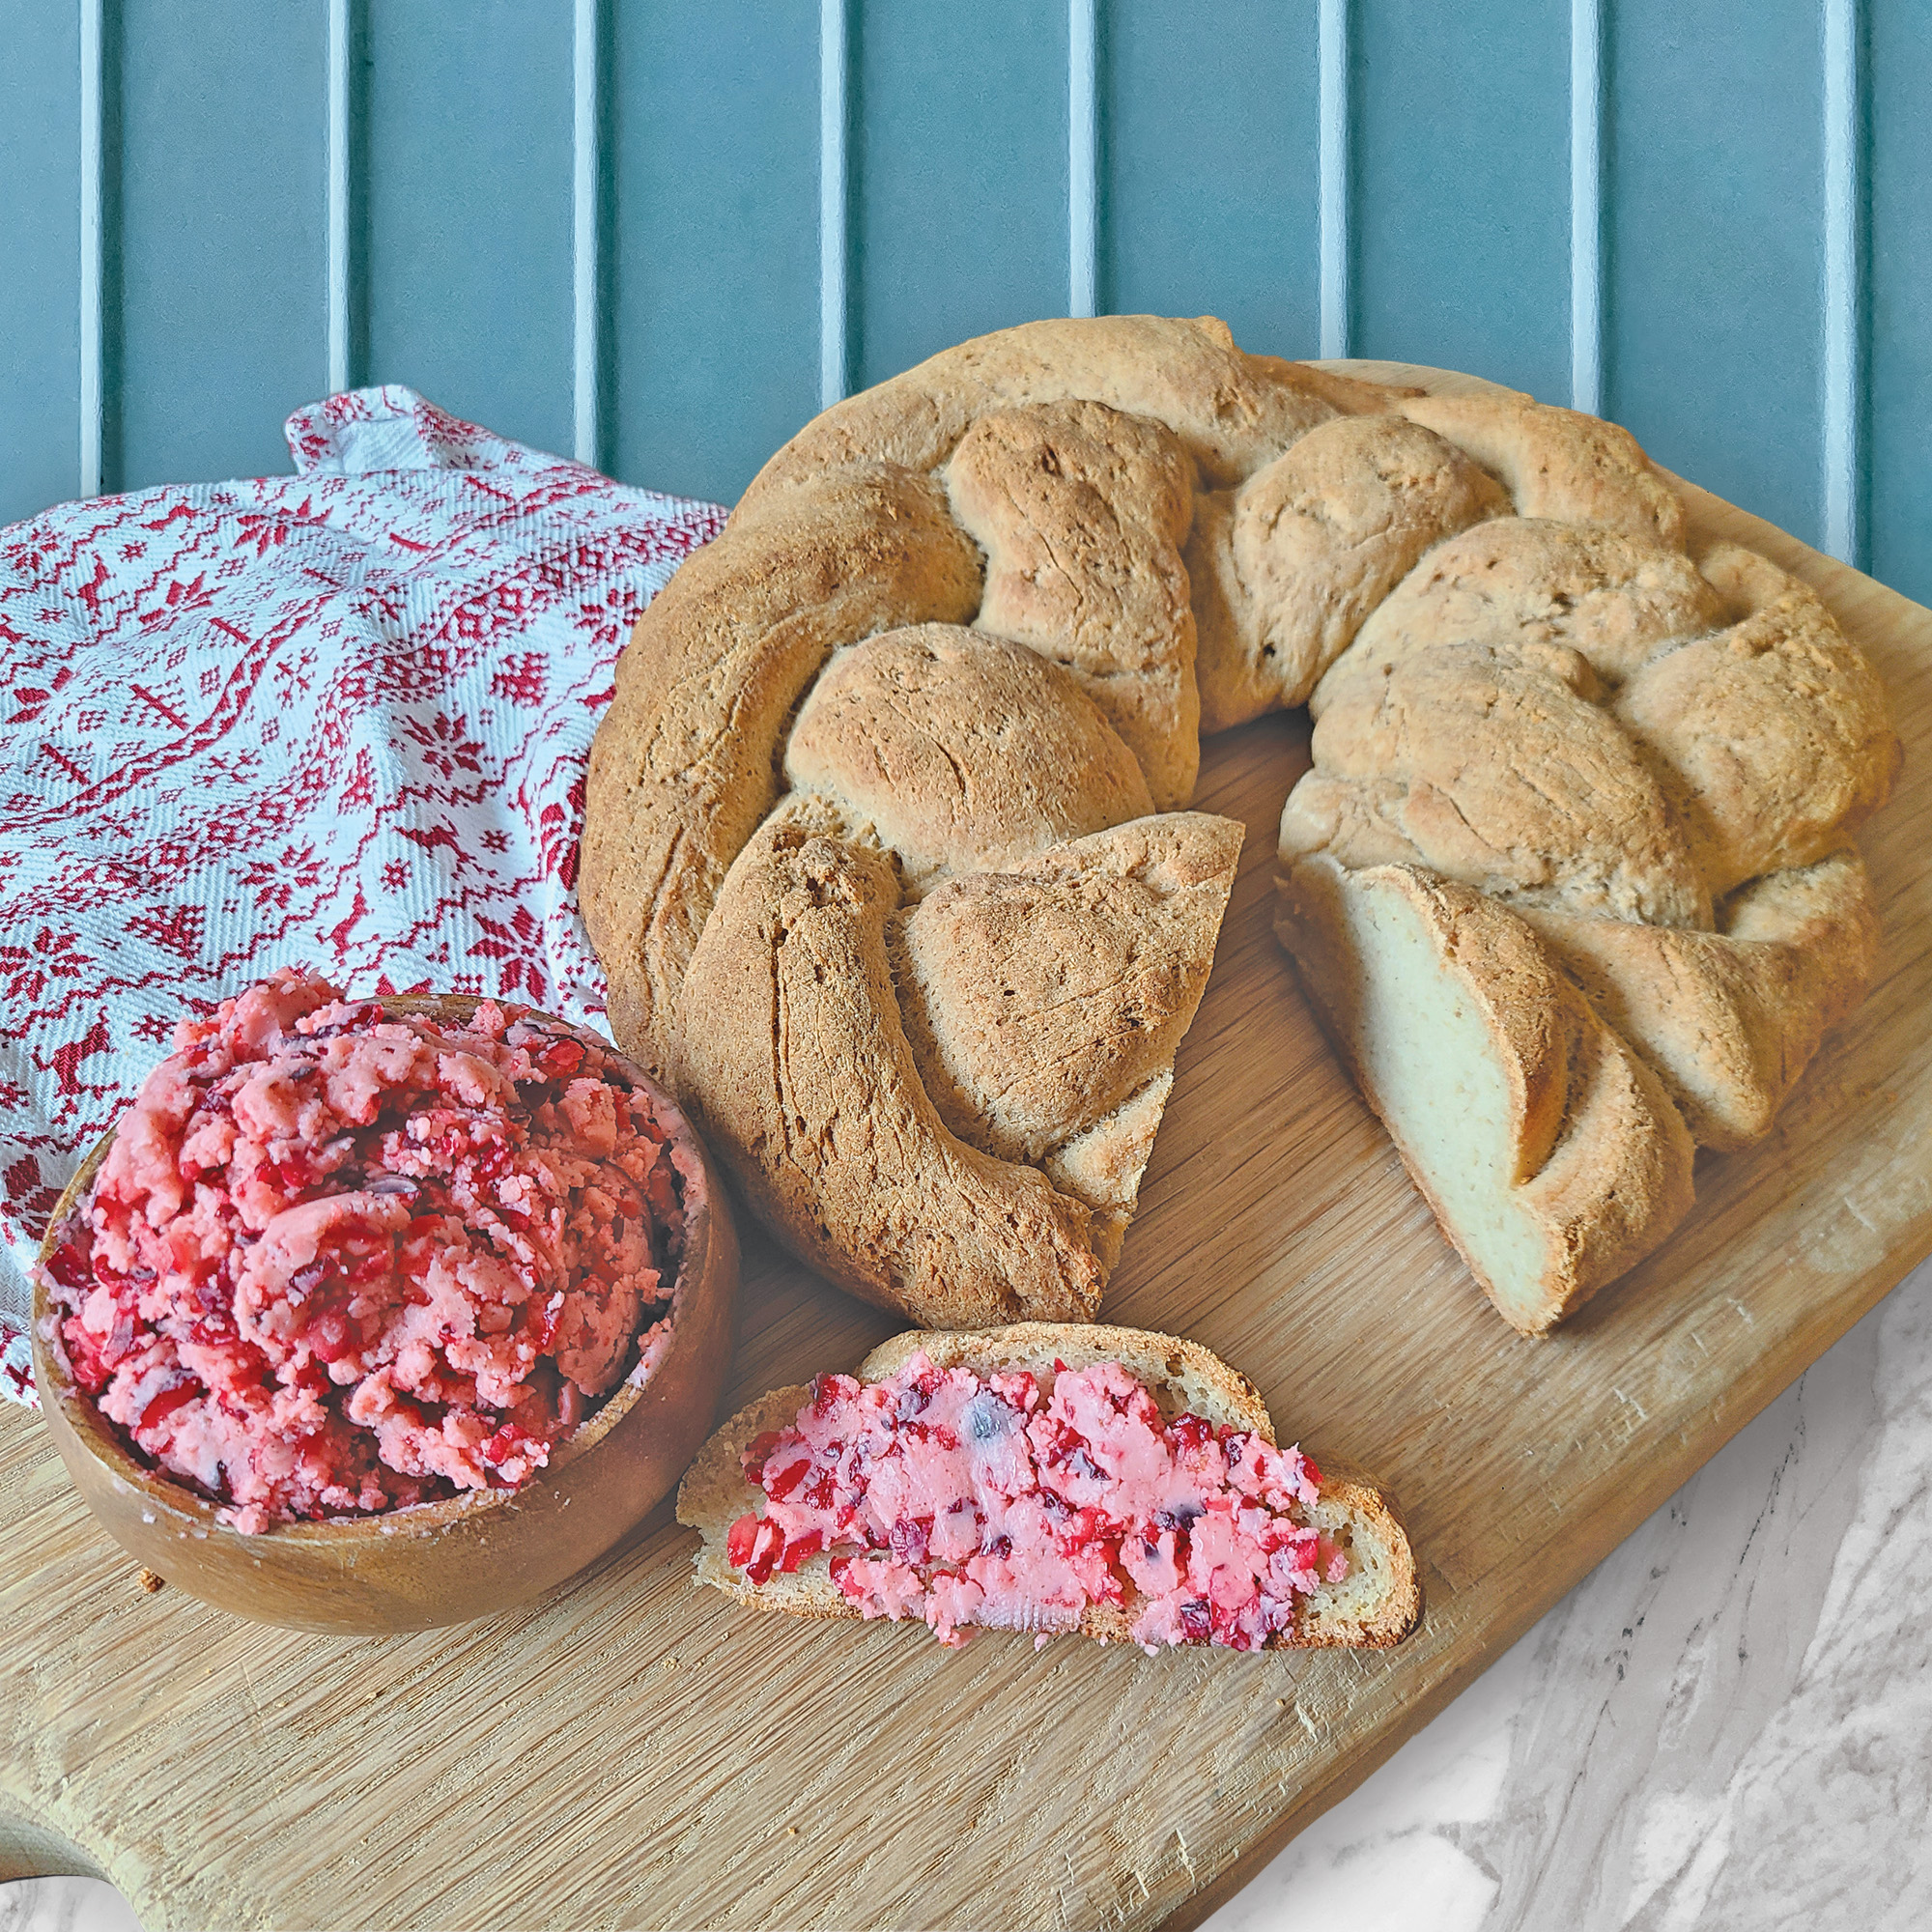
Braided Gluten Free Bread
Ingredients
Equipment
Method
- Preheat oven to 425 degrees and place your pizza stone in the oven on the middle rack.
- Using a digital kitchen scale, measure all the dry ingredients(sorghum, tapioca, buckwheat, almond, potato, psyllium husk powder, cassava, and tigernut flours plus the instant yeast and sea salt) into a large bowl. Add to the Bosch machine and using the cookie paddles, mix flours/dry ingredients well to combine.
- In a separate small bowl, weigh the honey and olive oil. Add apple cider vinegar to that bowl and set it aside.
- In a large glass measuring cup or another microwave safe bowl, weigh the water. Warm it up in the microwave for about 45 seconds on High or until the water is about 105-110 degrees.
- Add wet ingredients to the dry ingredients in the Bosch machine. I often add about 620g(most of the water) and then add the rest of the water(or more if needed) after the I add the "wet" ingredients: the initial water, oil, honey, and apple cider vinegar. The dough should be thick, but it shouldn't be too wet, just a little tacky. This is one thing you will have to play with to see if you need to add a little more or a little less water. You only need to mix until all the ingredients are well mixed and the dough isn't sticking to the sides.
- Using your digital scale again, divide the dough into three equal amounts. Depending on the amount of total water you add, this will vary slightly from batch to batch.
- Gather your baking sheet and turn it upside down. Set aside.
- On parchment paper, lightly oil your hands with some olive oil, and roll each of the three portions into a rope that is about 18-20 inches in length.
- Carefully braid the three ropes together and form it into a ring as you are braiding. The dough might "break" a little as gluten free bread dough tends to do, so braiding carefully is important. If you do get a little breakage happening as you do this, get a very little bit of water on your hands, and gently help your dough connect back together.
- Very carefully slide the parchment paper with the braided ring onto the upside down baking sheet.
- Cover it with a lightly damp tea towel. Place this on top of your warm oven to rise(or another warm place) for 12-15 minutes or until bread has about doubled. When using SAF instant yeast, you don't have to wait a long time for your bread to rise, that is why I like to use this type of yeast. *I have not tried this recipe with any other type of yeast*
- When the braid has risen, remove the tea towel, and lightly drizzle and gently rub some Roburst olive oil onto the bread.
- Your oven and pizza stone should be perfectly warmed as it should have been heating for about 30-35 minutes at this point. CAREFULLY slide the parchment paper with your braided dough onto the hot pizza stone.
- Bake at 425 degrees for about 55 minutes. Make sure that your bread is up to at minimum 205 degrees in every area(especially the center of the ring). Once it has reached the correct temperature, remove the braided loaf from the pizza stone to a cooling rack.
- COOL THE BREAD COMPLETELY. no cheating! Gluten free bread needs extra time for the moisture to absorb into the bread. If you cut into it warm, it will be doughy and that is NOT tasty at all.
- Once the bread has cooled completely, slice it into slices and serve with my cranberry honey butter, or any topping of your choice. I actually think this bread tastes the best if you waiting 6-10 hours before cutting into it.
Notes
This braided gluten free bread is absolutely beautiful and would make a perfect appetizer with my cranberry honey butter. You could also slice this in wider slices and use it for sandwiches. It also toasts well for making garlic bread.
I hope that you will enjoy making this bread and serving it to your family.
Much love,
Emma
