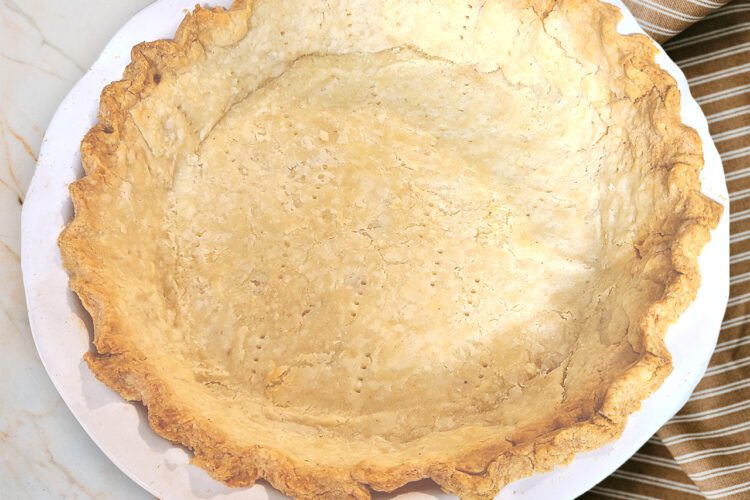
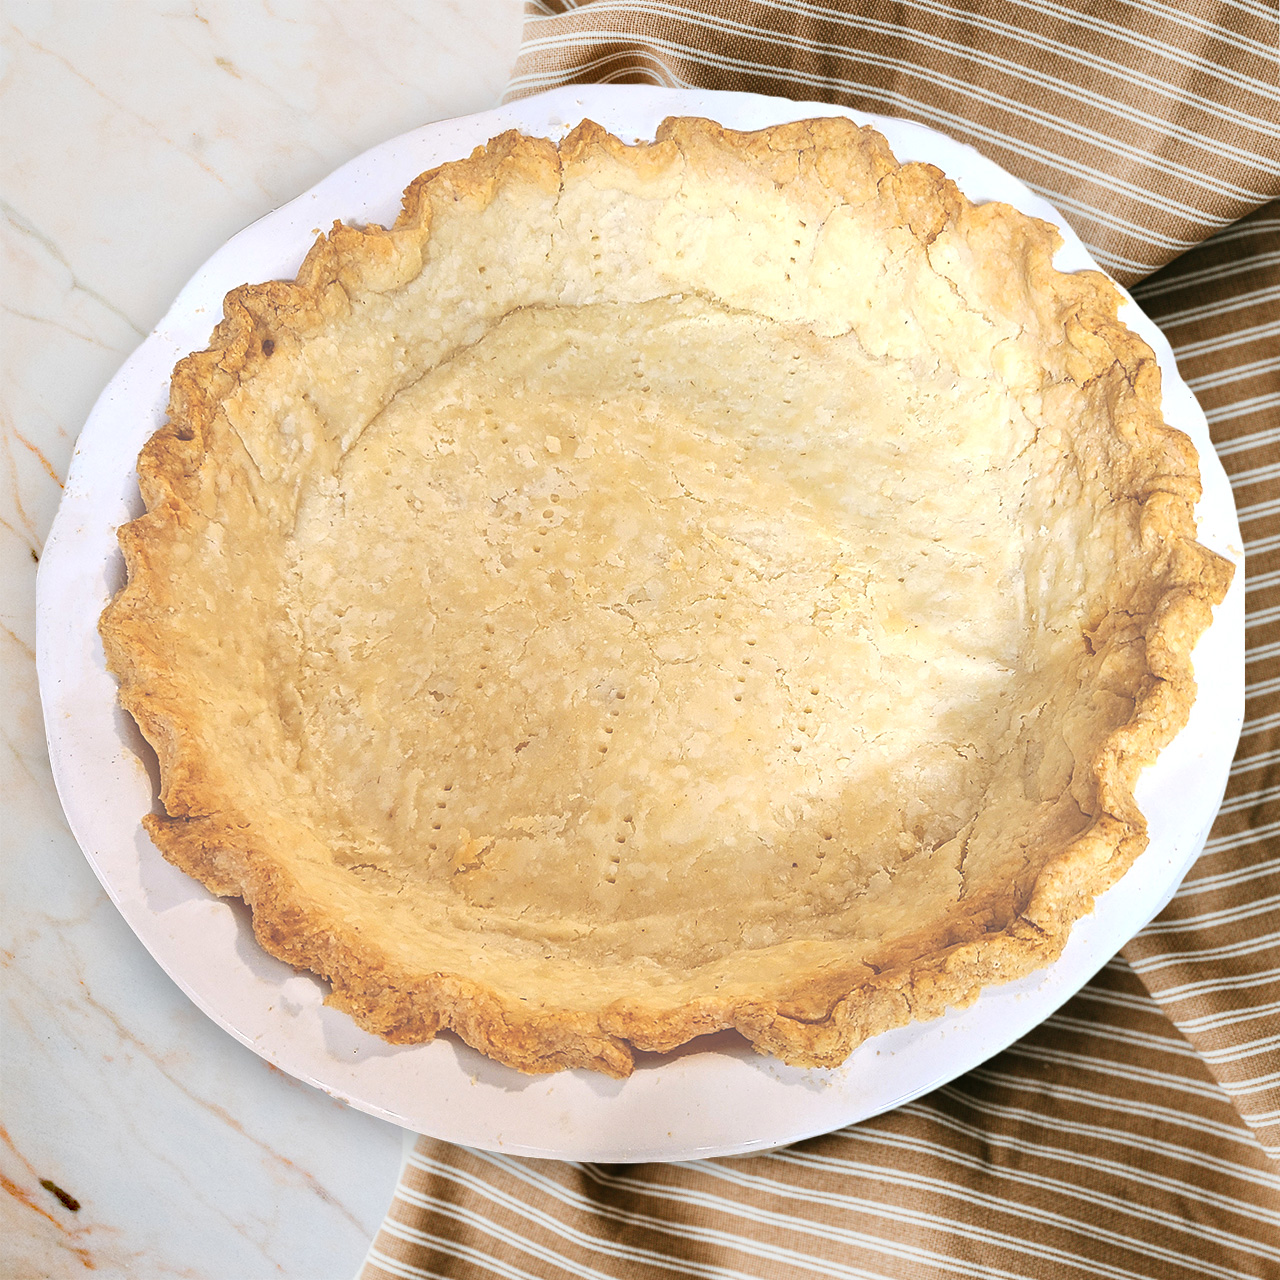
This pie crust has been a labor of love. I have missed having a light crisp pie crust to make my mother’s chocolate pie. And now I finally can! You can find gluten free pie crusts in the frozen section of some grocery stores, and I have often done that. But they just aren’t as good in my opinion. I hope that you will enjoy making this Gluten Free Single Pie Crust recipe.
I have only tested this pie crust in recipes where you bake the pie crust first then put the filling in and let it set. I hope to do more testing to give more clarification on changes you would need for say a chicken pot pie or an apple pie. I also have only tested this recipe with my all purpose flour blend. If you are using a different gluten free all purpose blend, you will most likely need to adjust this recipe.
Another key to this recipe working is to use pie weight beads. They help keep the crust where you want it to be instead of letting it shrink-which is what it wants to do while baking. These beads will also give a more even weight as your pie is baking, and with finicky gluten free flour, we need all the help we can get. The pie weight beads I use can be purchased at Orson Gygi. I like these particular ones because they come in a handy container so I always know where they are.
Gluten Free Single Pie Crust
Ingredients
Equipment
Method
- In a small bowl, mix 3-4 TBSP ice water, sour cream, and rice vinegar. Set aside.
- In a large bowl, add flour blend, xanthan gum, psyllium husk powder, sugar, and sea salt. Mix well.
- Cut cold butter chunks into the dry ingredients using a pastry cutter until the butter chunks are pea sized and well dispersed.
- Add wet ingredients to this and start to gently mix using a fork at first. Then use your fingers to see if the dough is coming together to form a dough. If it isn't, add 1 TBSP of cold water and mix again checking with your fingers. DO NOT add too much water. It is important to feel the dough and squish it together to see if it forms a dough. You don't want it too wet or too dry. It's hard to describe, but once you do it, it'll make more sense.
- Place a large piece of plastic wrap on your counter. Dump dough onto the center of the plastic wrap. Using the plastic wrap, form dough into a flat round disk shape. Cover well with the plastic wrap and place in refrigerator for 1 hour.
- Measure two pieces of parchment paper that will be large enough to roll dough into a large enough circle to fit in the pie pan and go up the sides and allow you to crimp the edges.
- Pre-heat oven to 375 degrees
- Roll dough out in between the two parchment papers until it is a large circle.
- This dough is very delicate once rolled out. You will need to transfer dough to the pie pan with both pieces of parchment paper. I center my crust over the pie pan and gently pell back the bottom layer of parchment paper. You might need an extra hand to help you do this part. Once the bottom parchment paper is removed, take off the top parchment paper and proceed to gently press dough into pie pan, and crimp the edges.
- Prick pie crust with fork all over the bottom and sides.
- Reusing some of your parchment paper, place a piece over your pie crust and dump in you pie weight beads. Bake at 375 for 25 minutes. CAREFULLY remove the parchment paper and pie weight beads. Continue to bake the pie for 5-8 more minutes or until fully cooked. If you are worried about the edges becoming too brown, you could make a aluminum foil ring around the pie.
- When cooked, remove to a cooling wrack and let cool completely before adding pie filling.
Having a gluten free single pie crust recipe in your tool box will open up many options for new recipes. Stay tuned as I will be working on this recipe a lot in the near future and giving more tips and recipes that go with it.
Much love,
Emma


[…] pie crust that tasted good. Who know that would be so difficult? But now that I figured out making my own gluten free pie crust, making this gluten free chocolate pie filling brings smiles to my […]