I have been dreaming of making gluten free white cake with raspberry and lemon curd filling for a long time. I based this recipe on Cake by Courtney’s Gluten Free Vanilla Cake with Mixed Berry Frosting. So, if you don’t want to use my adaptions for my flour blend, hers is also AMAZING!
I just happen to like how my flour blend lends itself to the perfect cake texture- in my opinion. I also just really love the combo of lemon and raspberries. I think about lemon curd often and how I can use it more in my life! I just need to convince my family that all things lemon are good.
The pans I used for this bake are from Amazon. They have great reviews and are only $18 for the set of three! Having the right type of metal is key when baking cakes. You want an even bake so that your cakes will be nice and level.
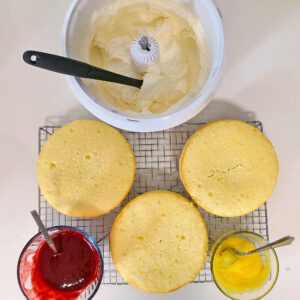
This cake is best made in two days. The first day, make your two fillings. This way the are very chilled when you go to make the cake. They don’t take more than 5-7 minutes each to make, so it’s totally doable!
Then the day you want to serve the cake, bake the cake layers and make the frosting. This keeps well in the fridge for several days, and also freezes beautifully in slices.
This would make a beautiful wedding cake or to celebrate with your sweetheart on Valentine’s Day or your anniversary.
White Cake with Raspberry Puree and Lemon Curd Filling
Ingredients
Equipment
Method
- Place all ingredients in a small sauce pan. Whisk together well. Turn heat to a low simmer and continue to cook and stir occasionally until it starts to thicken.
- Be careful to watch this curd as it thickens. It can all of the sudden thicken and you don't want the bottom to burn. So as it starts to thicken, stir more frequently, and then constantly until it reaches its full thickness. The thickness of jelly in a doughnut is a good reference.
- After it is done, remove from heat. Let cool for 20-30 minutes at room temperature, give it a good whisk again and then let it finish cooling in the refrigerator.

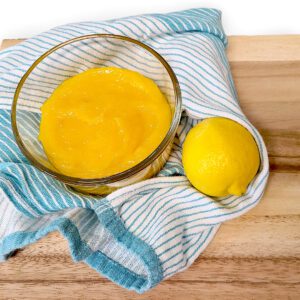
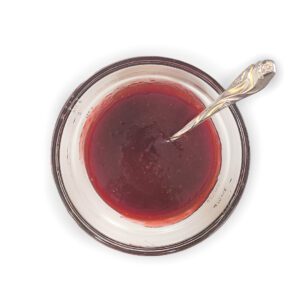
- In a medium sauce pan, whisk together the sugar, lemon juice, cornstarch, and sea salt until there are no lumps. Add raspberries and stir.
- Turn heat to medium, and stirring constantly at a slow stir(this is important-if you stop stirring the sauce can get air bubbles that pop and will splatter the HOT sauce on you), bring the mixture to a constant boil. Once it comes to a constant boil, turn the heat down to low and remove the spoon. Let boil for 1 1/2 minutes. Remove from heat and stir.
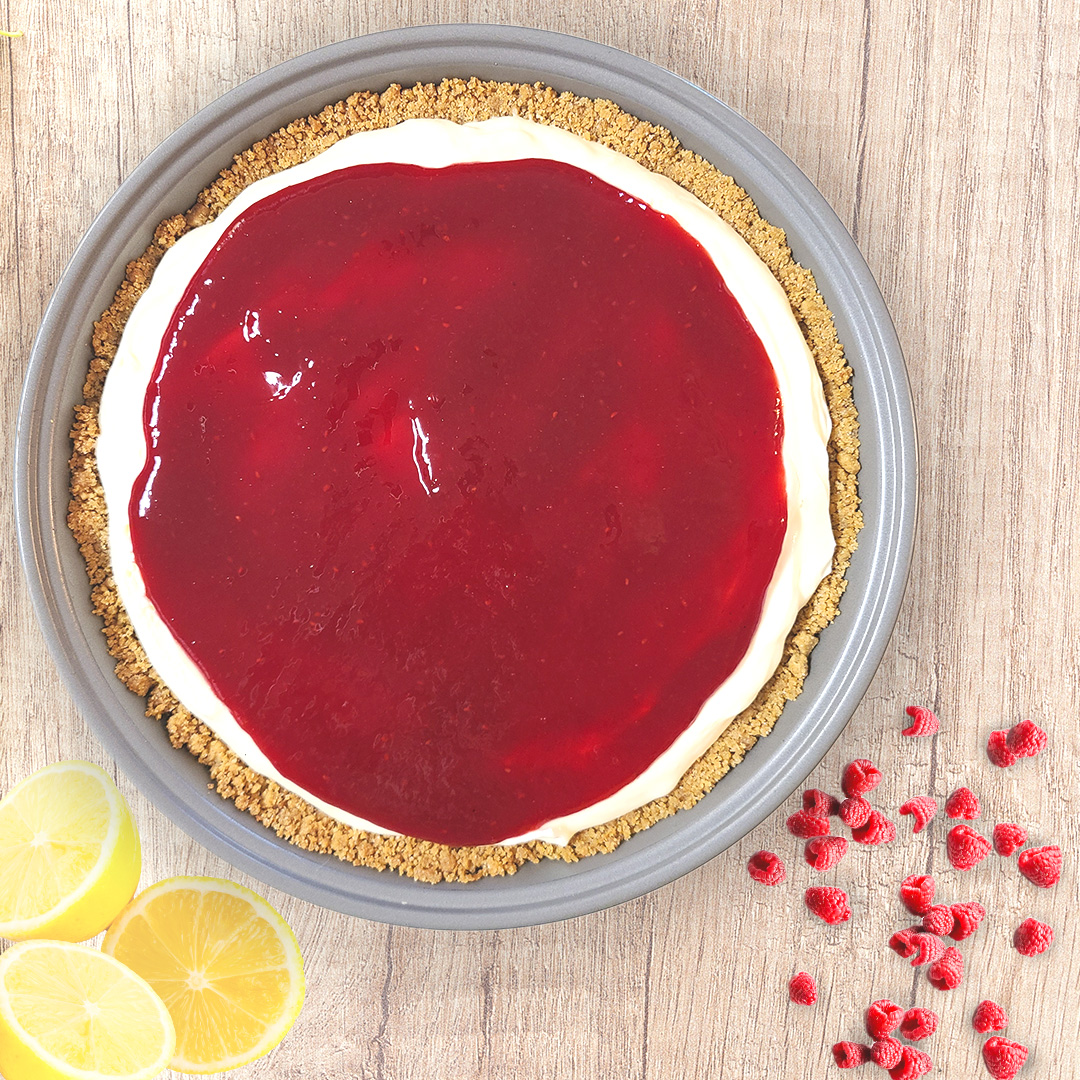
- Then using a fine mesh strainer over a glass bowl, separate out the seeds. Let the topping cool completely before refrigerating. The sauce will continue to thicken as it cools. Refrigerate. Make sure it is totally cold before using in the cake.
- Prepare all ingredients that need to be at room temperature.
- Preheat the oven to 325 degrees. Gather your three round 8 inch stainless steel baking pans. Trace the bottom of one pan three times on a piece of parchment paper. Cut out the circles. Grease the bottom and sides of the pans with butter. Place the round pieces of parchment paper in the bottom of the pans. Grease the top of the parchment paper. Set Aside.
- In a medium bowl, add flour, xanthan gum, and baking powder. Mix and set aside.
- In your Bosch mixer, with the paddle attachment, add the room temperature unsalted butter, olive oil, and granulated sugar. Mix on speed 2 for about 2 minutes until it is light and fluffy, pausing to scrape the sides as needed.
- Turn the mixer down to speed one and add the eggs/yolks one at a time, pausing to scrape the sides as needed.
- Add the vanilla and vanilla bean paste and mix again for 2 minutes on speed 2.
- Turn mixer to low, and alternate adding the dry ingredients and butter milk. Mix until combined.
- Pour cake batter evenly into your three cake pans. I like to use a digital scale for this. Depending on the weight of your eggs, etc, your weight might vary slightly. I weigh my cake at about 17.60 oz/cake pan.
- Place the cake pans on the center rack and bake for 33 minutes or until a toothpick comes clean. If your oven has uneven baking, you may need to rotate your pans half-way through. They will be VERY lightly browned around the edges and not wiggly at all in the center when done.
- Remove cake pans to a wire rack and cool IN THE PANS for 10 minutes. With a knife gently loosen around the edges of the cake.
- Using cutting boards or other wire racks, carefully tip out the cakes onto another surface and then back again to the wire rack to completely cool. If you are luck enough to have three cooling racks, this is ideal.
- When cake is completely cooled, wrap in plastic wrap and aluminum foil and place in the freezer. Take out the cake about 30 minutes before you plan to frost and fill the cake.
- Prepare unsalted butter, by taking it out of the fridge at least 20 minutes before making the frosting. I like to time this with the 30 minute thaw time of the frozen cake layers.
- In a large bowl with a metal mesh sieve, measure the powder sugar and sift. Set aside.
- In a Bosch mixer with the paddle attachment, cream the butter for 2-3 minutes on speed 2. Occasionally pause to scrap the sides.
- With the mixer on speed 1, add the sifted powdered sugar one cup at a time. Pausing occasionally to scrap the sides.
- Turn up to medium speed and add the whipped cream, vanilla, and salt.
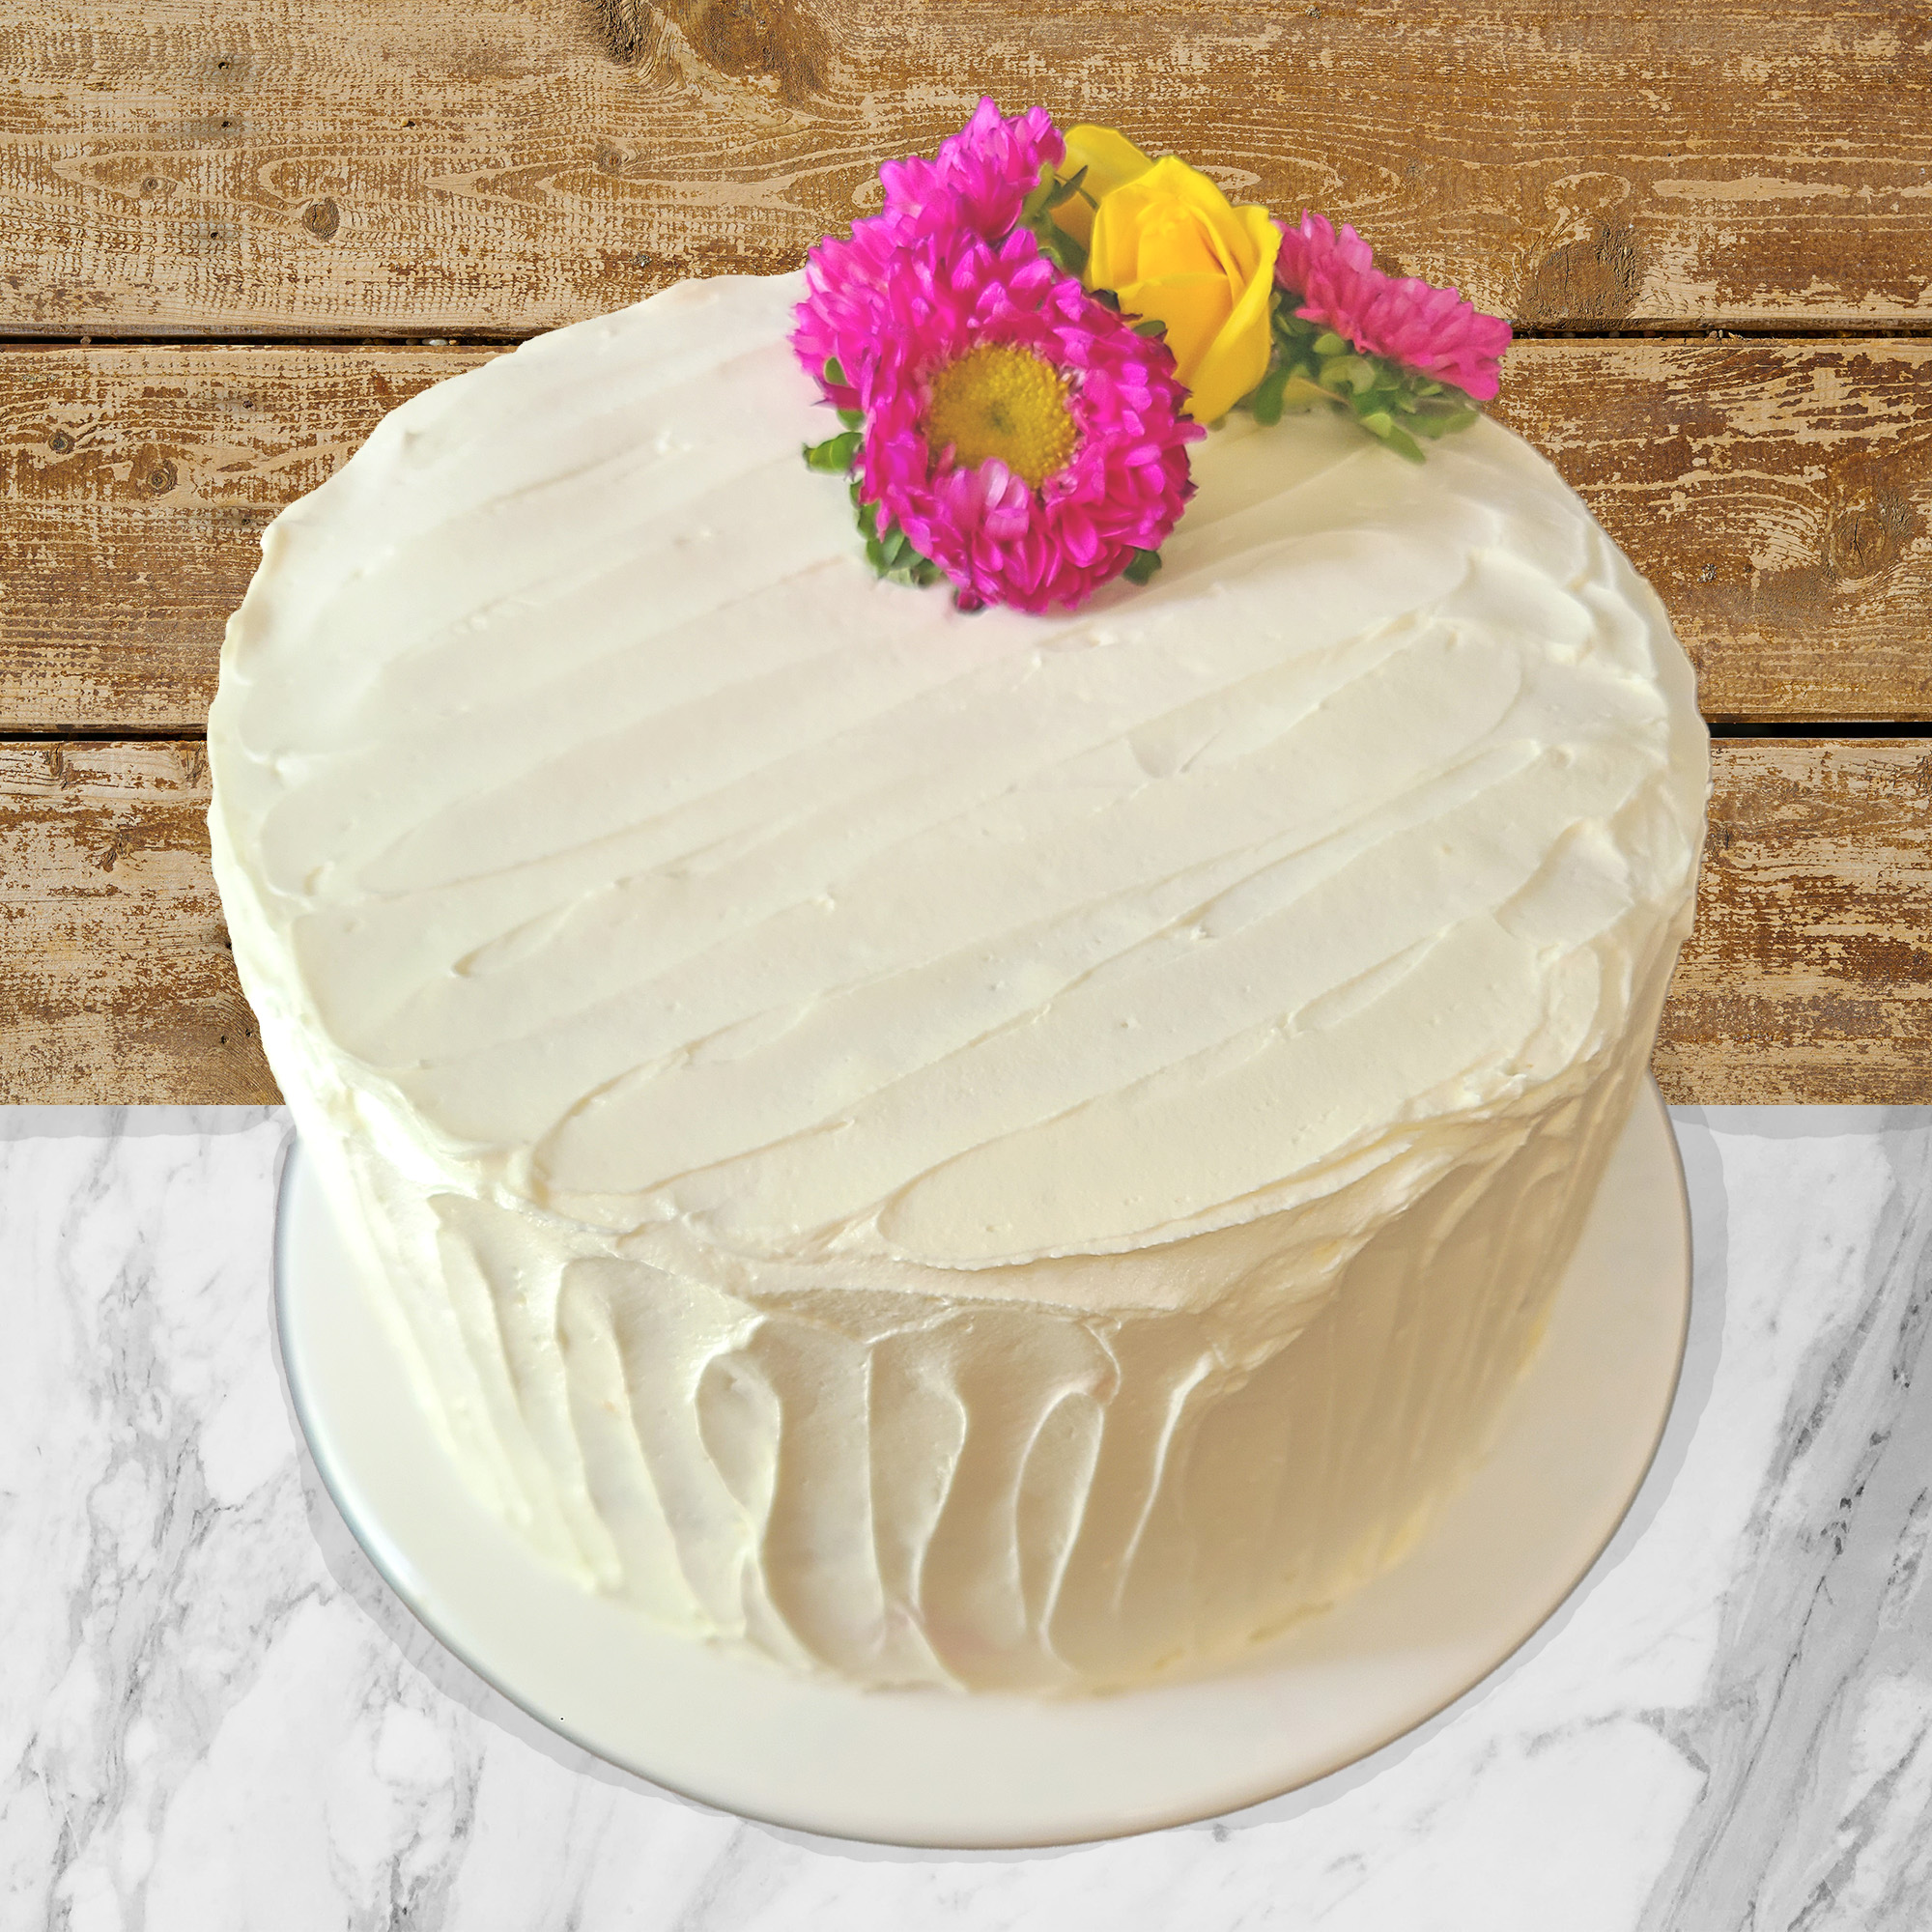
- Continue mixing for 3 minutes until the frosting is light, fluffy and lighter in color. It should be a beautiful white color.
- Frost cake immediately. I like to put some of the frosting into a piping bag for holding the filling layers from leaking out.
- Place the first layer of cake on a cake platter, or however you like to frost your cakes. *It is important that your cake is still cold to help keep the filling layers cool while frosting so that they are less likely to "leak" out.
- Using a piping bag, pipe some buttercream frosting around the edges of the first cake layer.
- Pour a generous amount of the raspberry puree onto the cake and smooth out to the buttercream circle.(you will probably only need half the batch-use the rest for another recipe)
- Add the second cake layer. And again,using a piping bag, pipe some buttercream frosting around the edges of the first cake layer.
- Add the lemon curd to the center of the cake layer, and gently smooth to out to the buttercream circle.
- Place the final cake layer on top. And using a metal off-set spatula, frost the cake as desired. If the cake becomes to warm, place in the fridge or freezer for 10-15 minutes before frosting the outside of the cake.
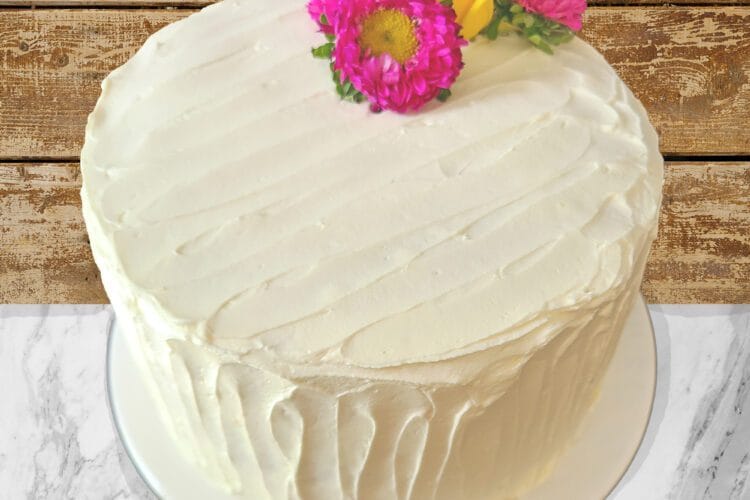
- Top with flowers, more piping, or other decorations of choice.
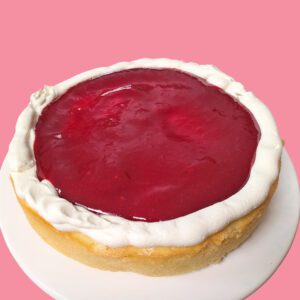

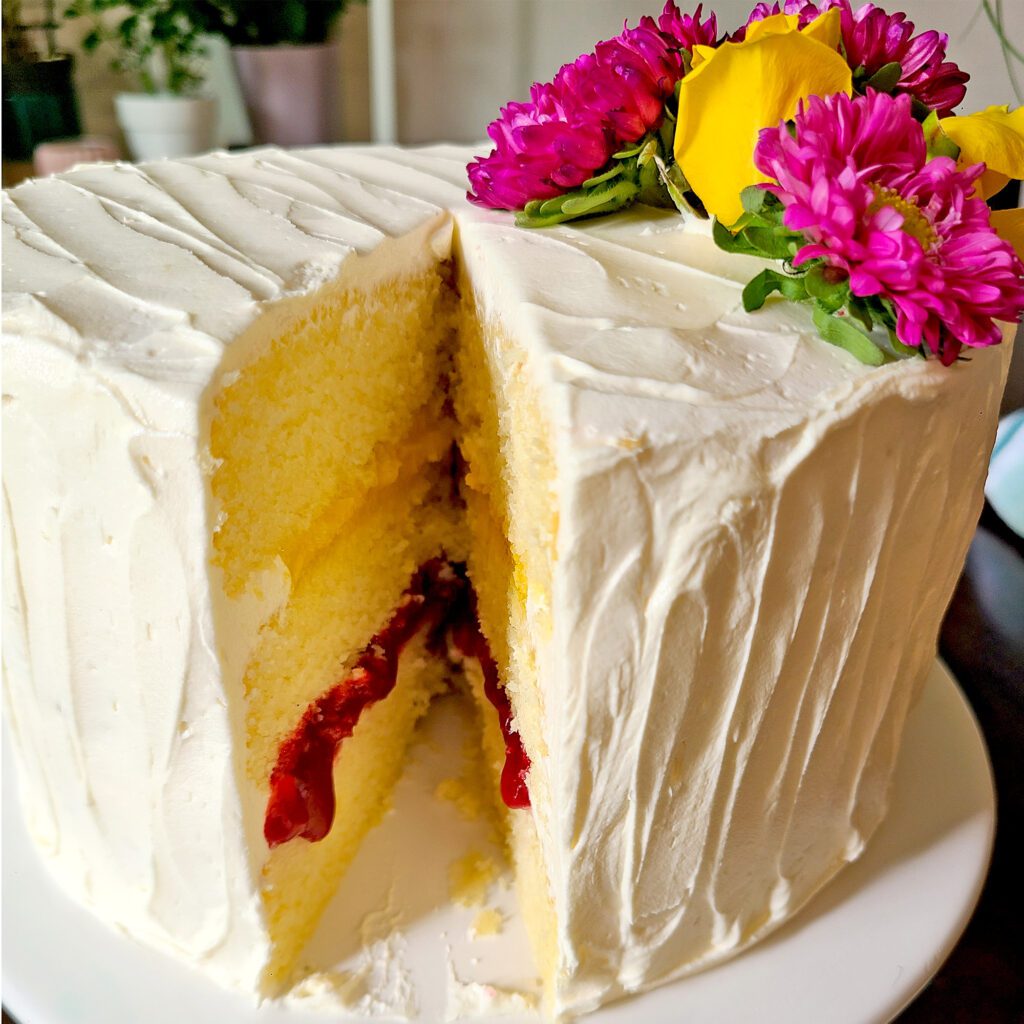
The raspberry puree is less thick than the lemon curd. So you have TWO options when serving. If the cake is room temperature, you will get some “leaking” when you slice into the cake like this picture. If you want to serve the cake chilled, it will remain nicely in its layer. Either way is fine, both taste AMAZING!
This is a LONG recipe. But I promise it is worth making. And I always feel like it is better to give you more details than less. I hope you will enjoy making this White Cake with Raspberry Puree and Lemon Curd Filling. I enjoyed making it with my eight year old daughter and my sister, neither of whom had ever piped frosting before. They did a great job for their first time! Making food together is part of the magic of baking. It makes memories that will last a life time.
Happy Baking my friends.
Emma
PS If you don’t want to make the fillings, you can also reserve some of the frosting and add crushed freeze dried strawberries or raspberries and use that as your filling. Then frost the cake as normal.